How to Flowchart with Microsoft Excel
Posted in: Guides
 It’s ironic, that having installed and trialed so many flowcharting solutions, my tool of choice was already installed on my laptop and I didn’t even know it.
Like most people, I used to think of Excel as just a spreadsheet package. However, as I’m going to show you in this guide, it trounces other expensive flowcharting solutions and is now my favourite flowchart software. Let me tell you why;
- Time/Money: Flowcharting won’t cost extra and there’s nothing to install
- Complete: Connector Lines and all common flowcharting symbols are built in
- No Learning Curve: If you use MS Office, the interface is already familiar
- Compatible: .xls is read by common software so distribution can be widespread1
- Hyperlinking: You can link components of the flowchart to anything2
I use flowcharts to map out any process. This is ideal for designing code, applications and any system in general. For the purpose of this guide, I’m going to flowchart the process of writing a blog post.
The 4 components I use most often are:

The Process
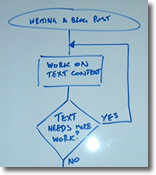 I usually start with a quick hand drawn sketch (I use a whiteboard). This step is optional but I find it saves time.
Once you have the idea of the basic flowchart it’s time to fire up Excel. I’ve provided the finished Excel file at the end of this page that will serve as a demo but you can also use it as a template if you like.
I’m using Excel 2003 but the steps should be similar in other versions.
Setting up the work area
- Open a new Excel spreadsheet and click the top-left corner to select all cells

- Right-click ANY column letter and choose Column Width, Set this to 1.71, click OK

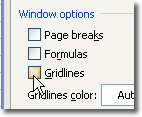
- If you like, turn off gridline display Tools>>Options>>View tab>>Gridlines tickbox
- Make sure you have the Drawing toolbar visible. View>>Toolbars>>Drawing

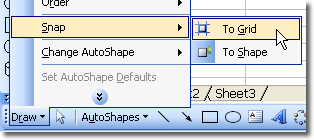
- From the Draw menu (on the Drawing Toolbar), select Snap>>To Grid
Drawing the flowchart (all steps carried out with the Drawing Toolbar)
- You can select the components mentioned above from Autoshapes>>Flowchart
- To draw the component you’ve selected simply click, drag, drop.
- To change a shape you’ve already drawn, click it’s border then click
Draw>>Change Autoshape>>Flowchart - To connect components with arrows use Autoshapes>>Connectors
- To write labels, click inside the shape and type
(for external text use a Text Box )
) - To move components around click and drag their border (connector lines follow)
Sub-processes/Hyperlinking
 Now the really cool part, if you create flowcharts that contain too much detail , you can break them down into seperate flowcharts. If a process demands a whole flowchart to itself I use the sub-process container in the parent flowchart and link it to a child flowchart using Excel’s built in hyperlinking.
To set this up;
- Draw the child/sub-process flowchart on a separate Excel worksheet

- On the child process, click the end component’s border

- Right-click the highlighted border and choose Hyperlink…

- Select Place in This Document from the menu on the left

- Highlight the sheet containing the parent flowchart, then click OK

- Click the end component, this will take you back to the parent flowchart
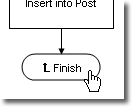
- Repeat steps 2-5 with the Sub-Process box in the parent flowchart, but select the child sheet
You should now be able to navigate between parent and child flowcharts just by clicking the linked components.
And that’s it, easy! Download and play with the example, try it out on your own.
Notes
1 Microsoft provide a free Excel viewer in case the person you send it to can’t read xls files.
2 you can hyperlink to any kind of file, image, video and audio. I once created a flowchart to design a telephone IVR and added wave files to the components to simulate the voice prompts.
Return to: How to Flowchart with Microsoft Excel
Social Web