Remote Assistance with Netmeeting & Hamachi
Posted in: Guides
 If you’ve ever provided over-the-phone computer support for a computer novice (partner, friend, relative, colleague) , you probably know how frustrating it can be when you spend 5 minutes describing where ‘the button’ is you want the other party to click.
I recently needed to provide remote assistance for someone overseas. The person was running Windows XP and had limited computer knowledge. I found out that they had Hamachi installed and so I used Netmeeting (comes installed with XP) to take control of their mouse and keyboard.
Here are the steps for anyone that wants to provide remote assistance using a secure method. I prefer this method as opposed to MSN Messenger’s Remote Assistance feature as the mouse pointer is always visible to both parties regardless of who is controlling it. This is invaluable when the person you are assisting wants to gesture somewhere on the screen.
Also, I’m going to provide you with a handy little vbs script file (only tested on XP) that will automatically fire up Netmeeting and Hamachi for you.
Requirements (both machines)
- Either Windows XP/98/ME1 untested on Vista
- Broadband connection is recommended.
Setup (both machines)
If you already have Netmeeting and Hamachi installed and working on both machines skip to the vbs startup script section.
Netmeeting
- Click on Start > Run, type conf and hit Enter.
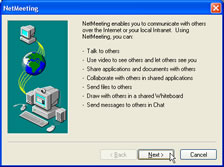
If this is the first time you are starting up Netmeeting you will have to go through the setup wizard. If you have previously used Netmeeting you will see the main Netmeeting window and you can skip straight to here - If Netmeeting has not been previously set-up you will see the following window
click next. - You need only fill in the first 3 fields of the information form. I never use my full details in this form and the email address does not need to be correct so@anything.com will do.
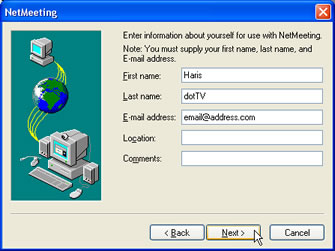 Click next.
 - Since we only want to use Netmeeting for it’s remote control capabilities you can select the option ‘Do not list my name in the directory’.
 Click next.
 - Select the speed of your connection.
 Click next.
 - If you are using a Microsoft operating system other than XP you may wish to leave the following tick boxes ticked, for XP users, I’ve provided a vbs script file (below) that runs Netmeeting/Hamachi for you so you can untick the tick boxes.
- The following windows will contain info about your audio setup. Ignore them and keep clicking next until you see the Finish button2.
- Click Finish
If Netmeeting is setup properly you will see the following window
Hamachi
Hamachi is a little gem of a (free!) program that creates a very secure virtual private network (VPN) via the internet. Multiple computers can be connected to each other as if they are part of a local network. Using it in conjunction with Netmeeting means that an otherwise unsecure remote control solution becomes very secured and most connection issues you would otherwise encounter are removed.
- Download Hamachi for Windows from here
- Run the installation file
- Clicking next, Accept the agreement and default settings and untick the option to have Hamachi start automatically when logging into Windows.
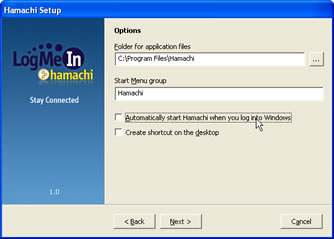
- If you like, tick the box that disables vulnerable windows services

- On the Basic vs Premium form choose use hamachi basic
 click next
 - Click install
- The installation program will run, if you have a software firewall installed, you may receive some warnings whilst the software is being installed. Allow the application to do whatever it needs to do.3
- Once that completes, click next and finish
- You will see Hamachi’s initial window with a blank IP address displayed on top
 . Go through the Hamachi Quick Guide until you are finished and have been allocated your unique Hamachi IP address.
 - On your machine (as per the guide) create a new network. On the novice’s machine, join that network.
- On your machine, right-click the novices computer in the Hamachi window (that should now be listed) and select Ping.
If your connection is working you will receive a series of replies,
If this does not happen you need to sort out your connection before moving ahead3.
Install vbs startup script (both machines)
I’ve written a small script that checks if Hamachi and Netmeeting are running. If one or both programs are not it will start up the required program. Since both Netmeeting and Hamachi need to be opened and ready to attempt a connection, this saves time for the person taking control and simplifies setup for the novice4 (to a single double-click).
The connection process
- Both: Run the vbs script (or open Hamachi and Netmeeting manually)
- You: If you haven’t already done so, try pinging the novice’s computer via Hamachi as described in step 11 of the Hamachi setup above.
- You: If you receive a response(ping replies), right-click on the novice computer (in Hamachi) and choose copy address
- You: In the Netmeeting window, paste that address in the drop-down menu (or text field) to the left of the telephone icon and then hit enter.

- Novice: Should see a call from Netmeeting that he/she should accept.
Once this is done you will both be connected and your names displayed in the lower half of the Netmeeting window.
- Novice: In Netmeeting, click Tools>Sharing.
- Novice: The novice must make sure that Desktop is highlighted, and then click Share

followed by Allow Control
- You: Double-click the remote window that pops up.
- Novice: Accepts the ‘take control’ request coming through.
- You are now in control of the novice’s mouse and keyboard. The novice can break control by hitting escape or you can hand control back by choosing Control > Release Control from the remote screen window.
Notes
1 Windows 98 (later editions) and XP come installed with Netmeeting, however, if you would like to install it on other Microsoft operating systems or update to version 3.01, click here. I haven’t tested Vista.
2 I prefer to use Skype/telephone for audio. The sound quality is better than Netmeeting’s and if you are having Netmeeting connection troubles you can still communicate regardless. If you find that Netmeeting’s audio is conflicting with other audio chat software play around with it’s audio settings in Tools>Options>Audio tab.
3 Some software firewalls will require further setup to work with Hamachi, you can check portforward.com for your software firewall’s specific hamachi setup guide.
4 I’ve placed the vbs script in a convenient location (say C: Drive) and have created a shortcut to it from the desktop. This also allows me to change the icon to something else more suitable.
Return to: Remote Assistance with Netmeeting & Hamachi
Social Web